
Open edX Development
 Chand Prakash
29 August 2025
Chand Prakash
29 August 2025
The Secret Behind Fortune 500 Employee Onboarding? Open edX.
 Chand Prakash
In online education, OpenedX stands as a robust platform that empowers educators to create and deliver courses. To enhance its functionality, the Tutor OpenedX Plugin, edx-notes, has been developed which provides a remarkable tool for educators and students. This article will explore how to effectively use the edx-notes plugin within the OpenedX environment, known as “Palm.”
Before delving into the Tutor OpenedX Plugin edx-notes, if you encounter challenges during the installation of the Tutor Dev Palm release or require guidance on the mounting process within Tutor Dev Palm, click the given link for comprehensive information and professional assistance.
Read More: Step-by-Step Installation of Tutor Using Palm Release
Also Read: How to Mount in Tutor Dev Palm Release
The edx-notes plugin is a versatile tool designed to allow users to take notes, highlight key points, and make annotations within course materials on the OpenedX platform. It offers an interactive and engaging way for learners to interact with course content.
To use edx-notes in Palm, you will first need to install it on your Tutor OpenedX platform. Once it is installed, you can enable it for specific courses in the Studio.
Once edx-notes in Palm is enabled for a course, you can start taking notes by clicking on the “Notes” tab in the courseware. You can annotate portions of the courseware by highlighting text or adding comments. You can also create and organize notes by creating notebooks and adding pages to notebooks.
To share your notes with others, you can export them to a variety of formats, including PDF, HTML, and EPUB. You can also share your notes directly with other students in your course.
Here, we will show you how to install, enable, and use edx-notes in Palm on your Tutor OpenedX platform.
Here are the steps on how to use and install Tutor OpenedX edx-notes plugin in Palm:
Execute the given command to install the edx-notes plugin in Palm on your Tutor OpenedX platform.
$ tutor plugins install notes
Note: If you have already installed the edx-notes plugin, there is no need to execute this command; you can proceed directly to step 2.
Enable edx-notes in Palm for specific courses in the Studio.
$ tutor plugins enable notes
Check the available tutor plugins list using the given command and save it in the config file.
$ tutor plugins list
$ tutor config save
$ tutor dev launch
Check if the edx-notes plugin is running properly.
$ tutor dev logs notes
If the edx-notes plugin throws an error like django.db.utils.OperationalError: (2003, “Can’t connect to MySQL server on ‘mysql:3306’ (111)”), it means that the plugin cannot connect to the MySQL database. This could be due to a number of reasons, such as the database server not being running or the plugin being configured with the wrong database credentials.

To fix this error, you need to edit the Tutor config file, config.yml, and configure the following settings:
//Password for the MySQL database user notes.
//Secret key used by the edx-notes plugin.
//Secret key used by the edx-notes plugin for OAuth2 authentication.
//Docker image for the edx-notes plugin.
//Hostname of the edx-notes plugin.
//Name of the MySQL database used by the edx-notes plugin.
//Username for the MySQL database user notes.
//URL of the Git repository containing the edx-notes plugin code.
$ tutor config save
The command saves the current Tutor configuration to the config.yml file. This is useful for saving changes that you have made to the configuration interactively, or for saving a copy of the configuration for backup or sharing purposes.
Restart the edx-notes plugin using the given command.
$ tutor dev restart notes
Tutor OpenedX Notes is a plugin that provides students with the ability to take notes on their course materials. It is a powerful tool that can help students to learn more effectively and efficiently.
Once the edx-notes plugin is installed and enabled on your Tutor OpenedX platform, you need to enable student notes for each course that you want students to be able to take notes in. To do this, follow these steps:
1. Go to the Settings section for the course.
2. Click on the Advanced Settings dropdown button.
3. Find the Enable student notes setting and change it to true.

4. Click the Save button.
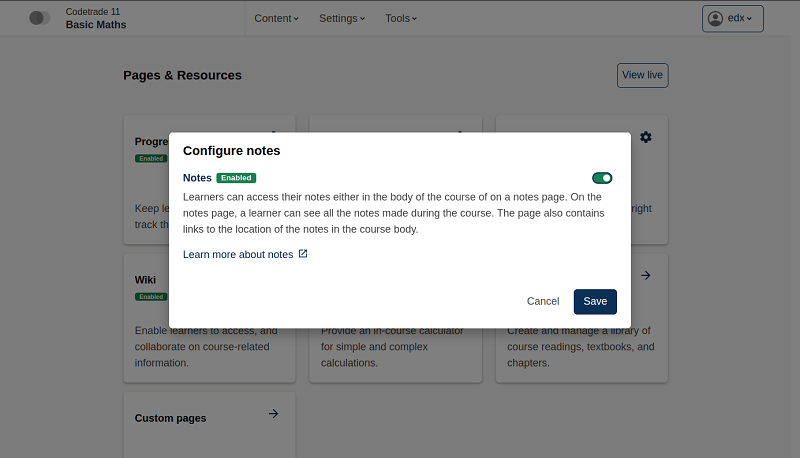
In addition to enabling student notes in the advanced settings, you also need to enable course configurations for notes in the page and resources section of Studio. To do this, follow these steps:
1. Go to the Page and Resources section for the course.
2. In the Fields section, find the Notes field and enable the Configure Notes checkbox.
3. Click the Save button.
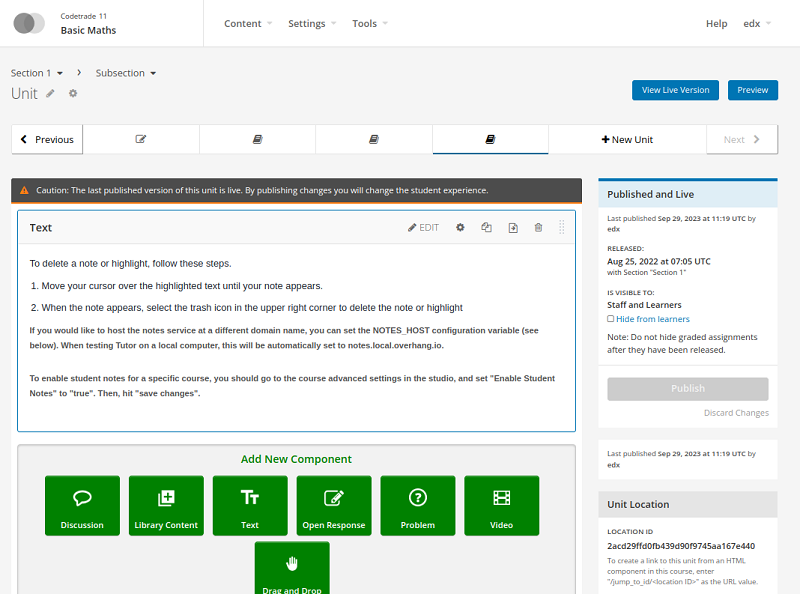
After you have enabled student notes and configured notes for the page and resources section, you can add text units to your course sections and subsections that contain notes. To do this, follow these steps:
1. Click on the Content section of Studio.
2. Click on the section or subsection where you want to add the notes.
3. Then, Click on the Text button to add a new text component.
4. Enter the notes in the text box.
5. Click the Publish button to publish the notes to the section.
Once you have added notes to the course content, students will be able to see the notes in the course on the LMS side. On the course page, students can add notes as important or remarkable. When a student highlights text as a note, a pencil icon will appear at the highlighted text. At the bottom corner of the course text section, a hide and show notes button will be shown.
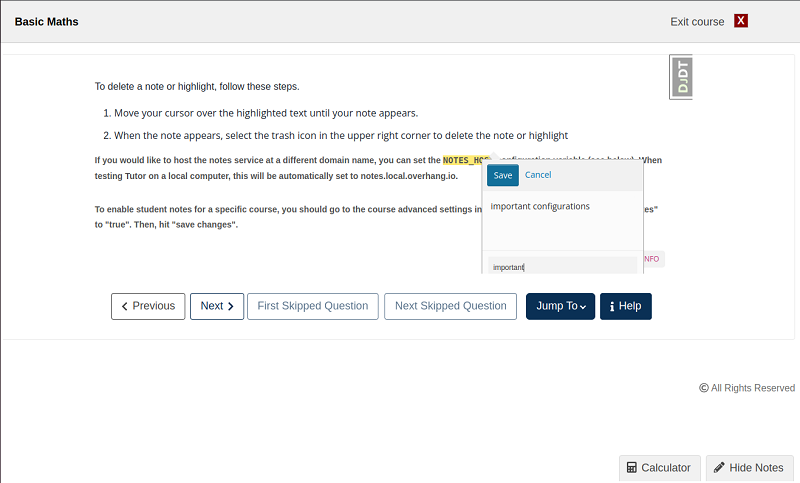
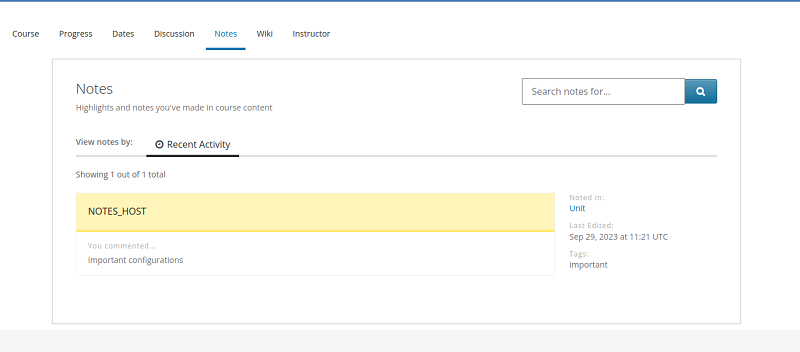
After you’ve added comments and tags, click the ‘Save’ button. The note will now be displayed with the new comments and tags as shown in a given image.
You can add, delete, or update notes at any time. To do this, simply click on the Notes tab in the course and then click on the note that you want to edit. You can then add, delete, or update the comments and tags as needed.

Note: The edx-notes plugin is useful for taking notes on any kind of text except exercises, discussions, video transcripts, or PDF documents.
On the lms side, the edx-notes page looks like this.
The edx-notes plugin for Tutor OpenedX is a powerful tool that can help students to learn more effectively and efficiently. By following the steps in this blog post, you can learn how to use the edx-notes plugin to take notes and improve your learning experience. If you need experts to develop your open edx project that stands out from the crowd, hire dedicated OpenedX developers from CodeTrade and get assured development services. Get in touch with us now…!
 Chand Prakash
 Chand Prakash
 Chand Prakash
 Chand Prakash
 Chand Prakash