
Open edX Development
 Chand Prakash
22 June 2026
Chand Prakash
22 June 2026
Open edX + AI Tutors: The 2026 Stack for Corporate Learning
 Chand Prakash
Streamline your Open edX project work with tutor dev Koa and enhance your coding skills. If you are unclear about how to install Tutor Dev Koa, this guide is for you. This step-by-step guide will show you how to install the Tutor Dev Koa release on your system. It doesn’t matter if you are a seasoned developer or just getting started, this guide will help you.
Tutor Dev Koa Release is an advanced platform designed to streamline the process of creating and managing online courses. It provides educators, instructors, and institutions with a robust toolkit for designing interactive and engaging learning experiences.
Koa, the 11th Open edX community release version on 9th June. Koa introduces several enhancements, such as customized learner schedules, milestones to track progress, and LTI 1.3 grading support. The front-end implementations of Open edX are now adopting micro-frontends and can be easily integrated into Koa. Furthermore, the underlying operating system has been updated to Ubuntu 20.04 to ensure ongoing security updates.
Before installing Tutor version 11 alongside the EdX Koa release, it is necessary to complete the following installation steps:
(Note: We tested on these Docker versions to install Tutor Dev Koa)
$ sudo apt-get remove -y docker docker-ce docker-ce-cli containerd.io
$ apt-cache madison docker-ce | awk ‘{ print $3 }’
$ VERSION_STRING={docker_version}
$ sudo apt-get install -y docker-ce=$VERSION_STRING docker-ce-cli=$VERSION_STRING containerd.io docker-buildx-plugin docker-compose-plugin
$ sudo systemctl status docker
$ docker –version
$ sudo rm /usr/local/bin/docker-compose
$ apt-cache madison docker-compose | awk ‘{ print $3 }’
$ sudo curl -L “https://github.com/docker/compose/releases/download/1.25.0/docker-compose-$(uname -s)-$(uname -m)” -o /usr/local/bin/docker-compose
$ sudo chmod +x /usr/local/bin/docker-compose
$ docker-compose –version
Create a new directory named “tutor_koa” in the current location.
$ mkdir tutor_koa
Change the current working directory in a terminal or command prompt to the directory named “tutor_koa”.
$ cd tutor_koa
Download the most up-to-date binaries, which are highly advantageous for Tutor installation, by visiting the following link: https://github.com/overhangio/tutor/releases. Utilize the provided command line to accomplish this. (For our instance, we’ve installed Tutor version 11.3.1)
$ sudo curl -L “https://github.com/overhangio/tutor/releases/download/v11.3.1/tutor-$(uname -s)_$(uname -m)” -o /usr/local/bin/tutor

Use the command to grant permissions to the folder where Tutor has been downloaded using root access.
$ sudo chmod 0755 /usr/local/bin/tutor
![]()
Verify the currently installed version of Tutor
$ tutor –version
![]()
Execute the given command to install Tutor in development environment. Here, we set up development environment so choose ‘n’, to execute further process.
$ tutor local quickstart

Subsequently, the procedure will prompt you to provide three specific details related to the Tutor platform, which will be stored in the config.yml file.
Once the installation process is finalized, all services will be initialized.

Execute the given command to check the Tutor plugins
$ tutor plugins list
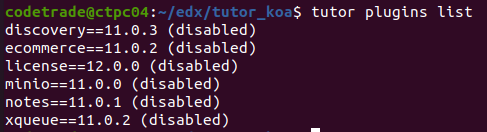
Execute the command to enable or disable the plugins.
$ tutor plugins enable/disable (plugin-name)
To enable or disable the plugin name you would replace “(plugin-name)” with the name of the specific plugin you want to activate.

Once plugins have been enabled or disabled, or any changes to the configuration have been made, it is important to save the config.yml file.
$ tutor config save

Finally, execute the given command to complete your tutor dev koa release in your system
$ tutor local quickstart
You are now able to utilize the Tutor Dev Koa release to create and manage your personalized Open edX platform, accessible at http://local.overhang.io.
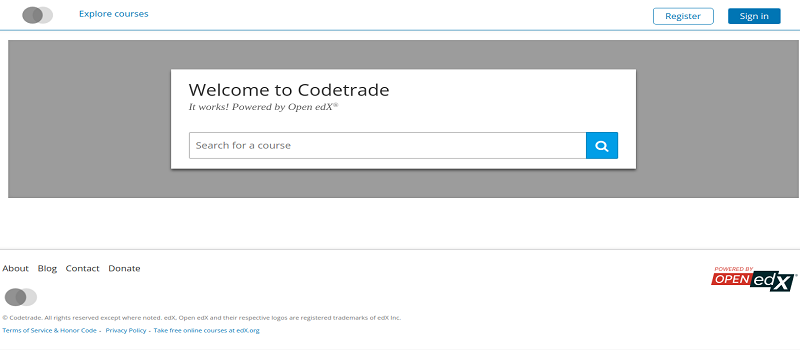
By following the step-by-step installation process outlined in this guide, you’ve taken the crucial first step towards harnessing the power of Tutor Dev Koa Release. From its interactive features to its personalized learning capabilities, this platform holds the potential to revolutionize the way we teach and learn.
If you want to develop your own Open edX platform using Koa, you can reach out to CodeTrade, a well-known Open edX development agency located in India. CodeTrade is recognized as a certified Open edX partner and provides a range of services including consulting, support, maintenance, and personalized development assistance for various components of your learning management system (LMS).
Get a free consultation for your Open edX queries from CodeTrade, Contact us now…!
 Chand Prakash
 Chand Prakash
 Chand Prakash
 Chand Prakash
 Chand Prakash