
Complete Guide to Mounting and Changing Themes in Tutor Dev Lilac
Once you've effectively installed the Tutor Dev Lilac Release on your system, the next step involves setting up the Tutor Dev Lilac release on your local machine. In case you need to revisit the installation instructions, you can follow the provided link.
Read More: Installation of Tutor Dev Lilac on Your System: Step-by-step Guide
After the successful installation of Tutor Dev Lilac, the next step involves mounting the Lilac release onto your local system. Also, in this tutorial, we covered how to apply themes in Tutor Dev Lilac with easy steps. Let's delve into the comprehensive, step-by-step process of Mounting and Changing Themes in Tutor Dev Lilac.
Mounting Process in Tutor Dev Lilac
Copy Files from Container
To mount files from the local system to a container, you first need to copy the files from the container to the local system. You can use the following command to do this:
$ tutor local bindmount (service_name) (container_path)For example, During the mounting process, we copied the LMS container directory.
$ tutor local bindmount lms /openedx/edx-platform
The tells Tutor to bind mount the host directory /openedx/edx-platform to the /openedx/edx-platform directory in the LMS container. This means that any changes made to the files in the host directory will be reflected in the LMS container, and vice versa.
The bindmount command takes two arguments: the name of the container to bind mount to, and the path to the host directory to bind mount. In this case, the container name is lms and the host directory is /openedx/edx-platform.
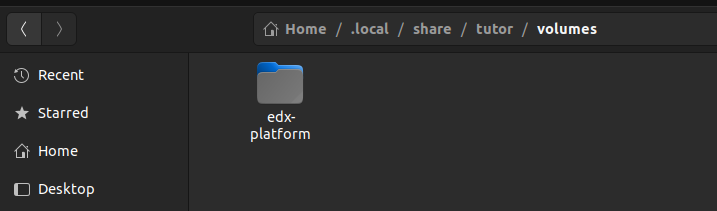
After that, a volume will be created in the directory .local/share/tutor and named volumes. This volume will contain the contents of the folder that was copied from the container to the local system.
Benefits of Mounting a Volume in Tutor Dev Lilac
- Allows you to share files and directories between your local machine and the Docker containers.
- It makes it easier to troubleshoot problems.
- Helps to prevent conflicts between your local machine and the development environment.
To make the container file mounting permanent, create a new file called docker-compose.override.yml in the terminal. This file will contain the configuration for mounting the container files.
$ nano "$(tutor config printroot)/env/local/docker-compose.override.yml"And store the services in the following format in the file.
(local-volume-path):(container-path)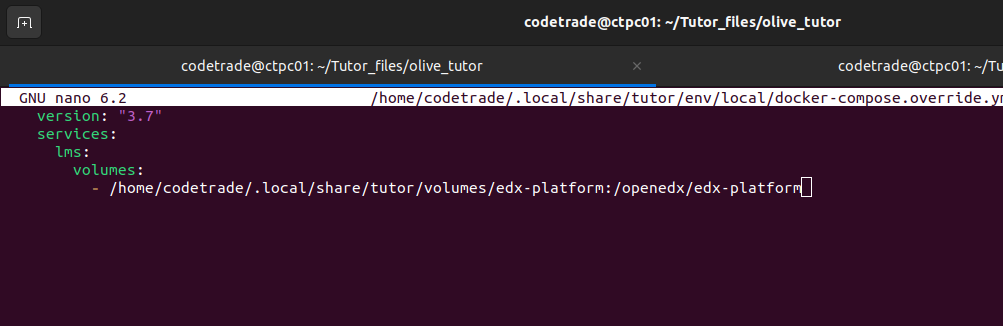
After you have completed these steps, your file will be mounted permanently.
How to change themes in Tutor Dev Lilac
To set a custom theme in Tutor, you can either:
- 1. Download a theme from the internet.
- 2. Apply one of the existing default themes.
To apply a default theme, you must first copy the theme files to the Tutor's environment file build directory. For example, In our case, we have placed a default theme called "red-theme" from the edX-platform's theme directory into the following location:
/.local/share/tutor/env/build/openedx/themes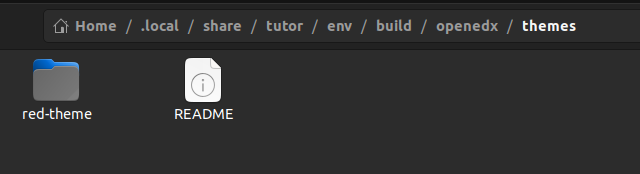
Once you have copied the theme files to the correct directory, you can build the images using the following command:
$ tutor images build openedx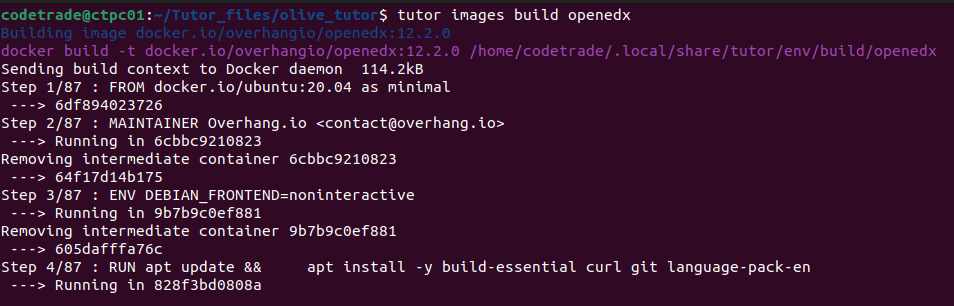
The given command is used to build the Docker images necessary for an Open edX platform. The tutor images command is a subcommand of the tutor command, which is the main command for interacting with the Tutor.
When we execute the command, the Tutor will rebuild the images with your selected theme. This process can take some time, depending on the speed of your internet connection and the resources available on your computer.
After building the images, the Tutor needs to be restarted to apply the theme. You can use the following commands to restart Tutor:
$ tutor dev stop $ tutor local start -dThe first command, will stop Tutor Dev Activities. The second command will start Tutor in detached mode. This means that Tutor will run in the background and you will be able to continue using your terminal.
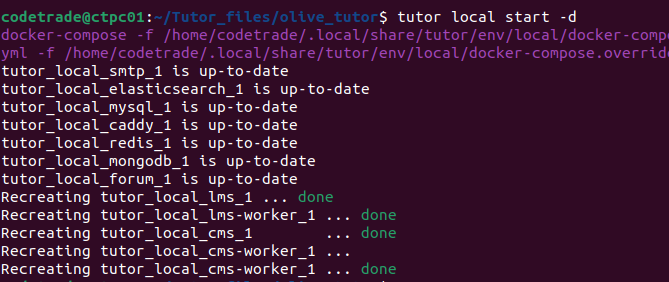
Here, the -d flag is used to detach containers which allows them to run in the background.
After starting Tutor, to apply the theme use the given command:
$ tutor settheme (theme_name)For example, to apply the red-theme, you would run the following command:
$ tutor local settheme red-theme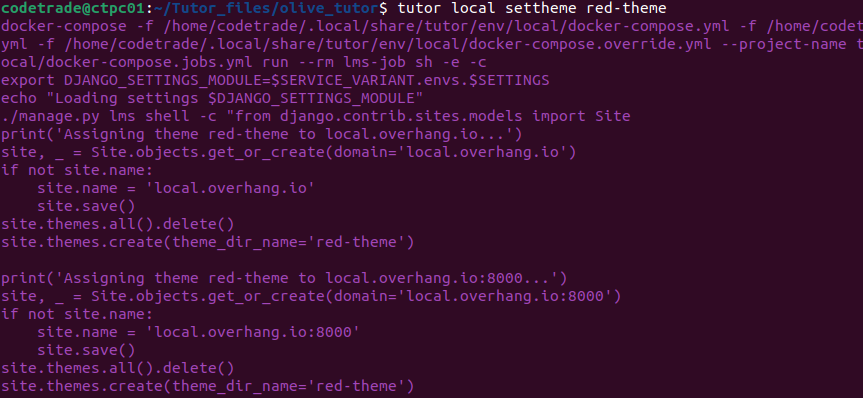
This command will successfully apply the theme to your tutor.
Conclusion
Using these easy steps you can easily mount and change themes according to your needs in the Tutor Dev Lilac Open edX Platform. With the given process you can ensure that you are mounting and applying themes to your data in a way that is efficient, secure, and easy to use.
If you need expert advice for your Open edX project. CodeTrade India is a leading open edX development agency that helps organizations of all sizes create, launch, and manage their own online learning platforms. They have a team of experienced open edX developers and consultants who can help you with everything from planning your project to deploying your platform. Contact CodeTrade Now…!