
Molecule Editor and Viewer Tool: A Powerful Learning Resource in Open edX
Imagine a world where chemistry transcends textbooks and lecture halls, where molecules dance across your screen, and you can build, analyze, and manipulate them with the click of a mouse. This is the reality offered by the Molecule Editor and Molecule Viewer Tools in Open edX, a powerful tool redefining how we learn about the invisible world of atoms and bonds. Here we explore how Molecule tools can make Open edX learning more engaging.
Let's start by understanding each tool individually.
Molecule Editor Tool in Open edX
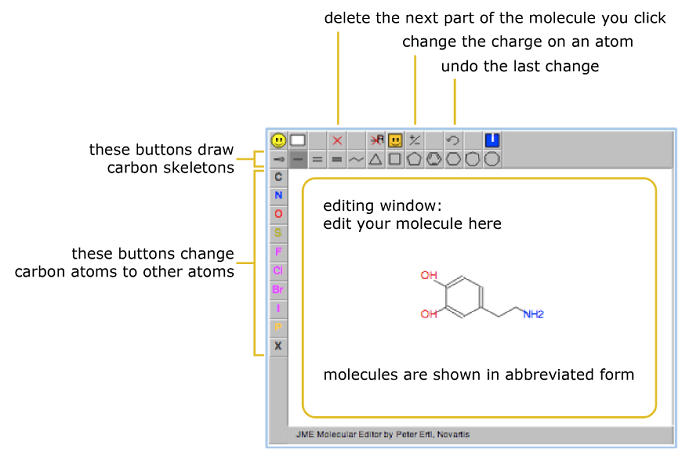
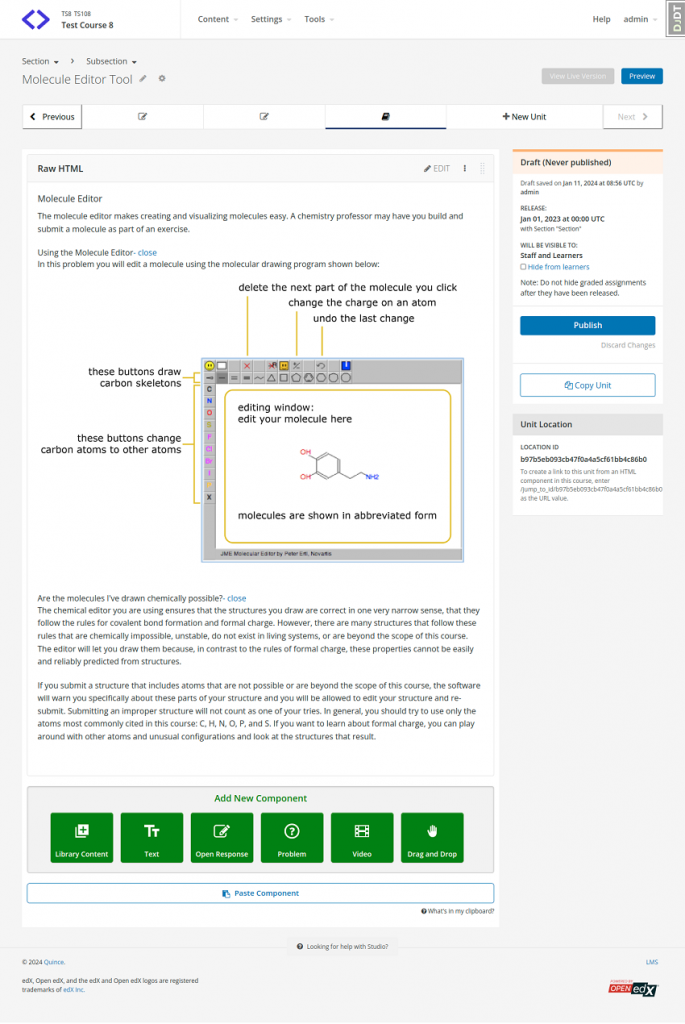
The Molecule Editor in Open edX provides an interactive environment for learners to explore molecular structure and bonding, even beyond the limitations of existing molecules. It implements chemical constraints like valid bond formation and formal charge that offer immediate feedback and prevent invalid submissions. Two tools will be integrated with Molecule.
There are two tools available to incorporate with Molecule.
JSME
Based on JavaScript and developed by Bruno Bienfait and Peter Ertl. It is a successor of the JME Molecule Editor applet. And, supports drawing molecules and reactions on desktop computers, as well as smartphones and tablets including the iPhone, iPad, and Android.
JSmol
The JSmol web app is an HTML5 JavaScript app that extends the Java-based molecular visualization applet Jmol. Java applet can be used in conjunction with it to provide an alternative to Java when the platform does not support that (iPhone/iPad) or applets (Android).
Let’s move towards the process of How to create Molecule Editor in Open edX.
How to Create Molecule Editor in Open edX
To embark on your molecular journey, follow these steps to create the Molecule Editor:
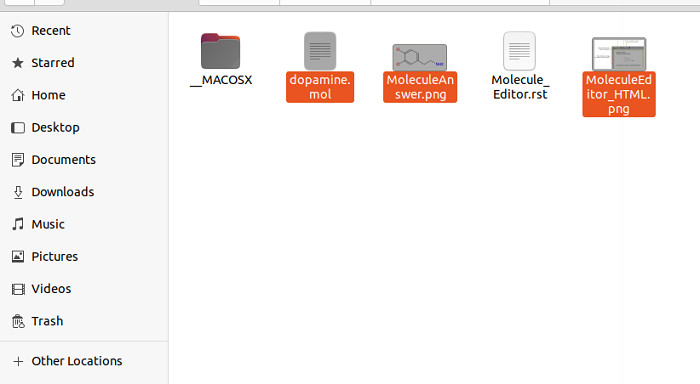
Step 1: Download Required Files
Download the .zip archive containing the necessary files from http://files.edx.org/MoleculeEditorFiles.zip. Extract the archive to access the following files:
- MoleculeAnswer.png
- MoleculeEditor_HTML.png
- dopamine.mol
Customize your molecular experience by choosing a different molecule from the extensive list of molecules on the BioTopics website.
Note:
In the tool, the first molecule to appear is dopamine. You can also use a different molecule by downloading its .mol file from the list of molecules on BioTopics. Upload your .mol file to the Files & Uploads page in the studio for your course and change "dopamine.mol" in the example code to your own.
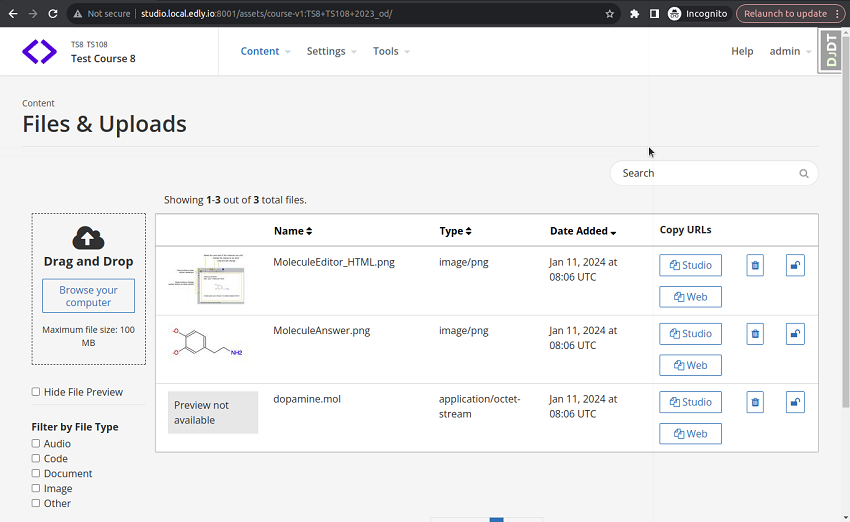
Step 2: Upload Files
Access the Files & Uploads page within your Open edX course.
Required to upload three files in this folder (MoleculeAnswer.png, MoleculeEditor_HTML.png, dopamine.mol).
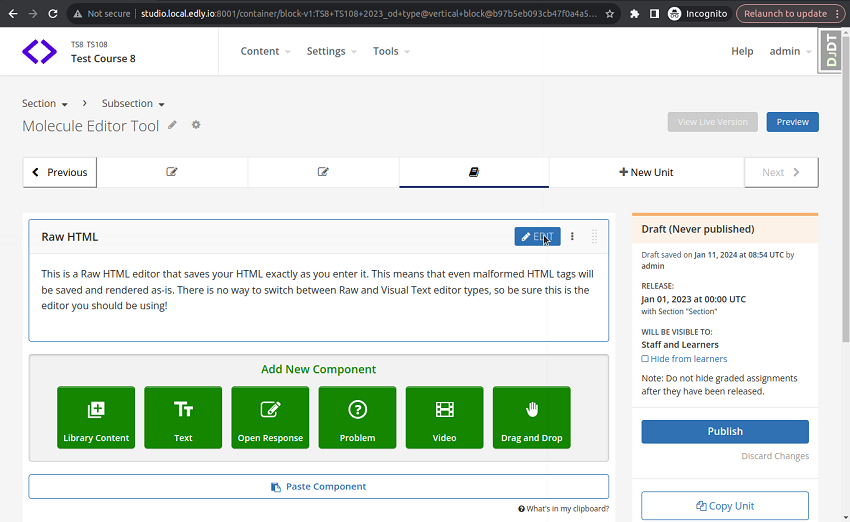
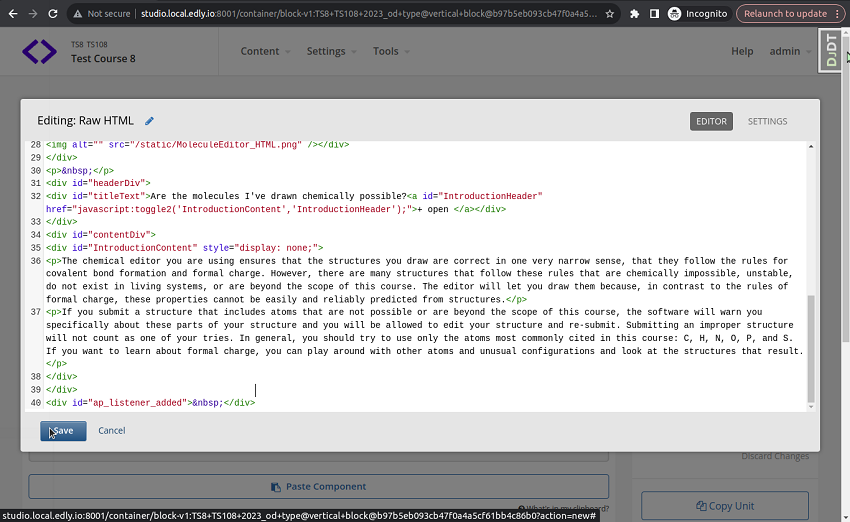
Step 3: Create HTML Component
Navigate to the unit where you want to integrate the Molecule Editor.
Click "Add New Component" and select "HTML".
Press"Edit" in the newly added component.
Paste the specific HTML component code provided in the Open edX documentation for your release (this code varies slightly across releases).
"Save" to preserve the component.

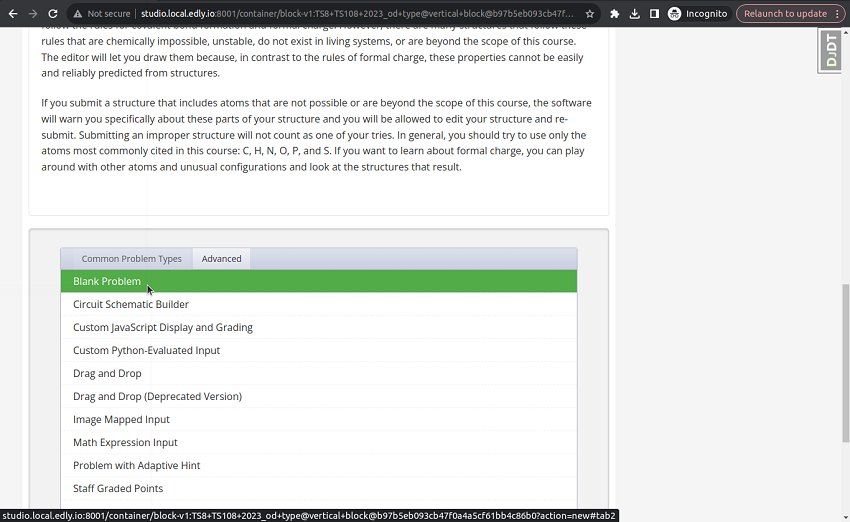
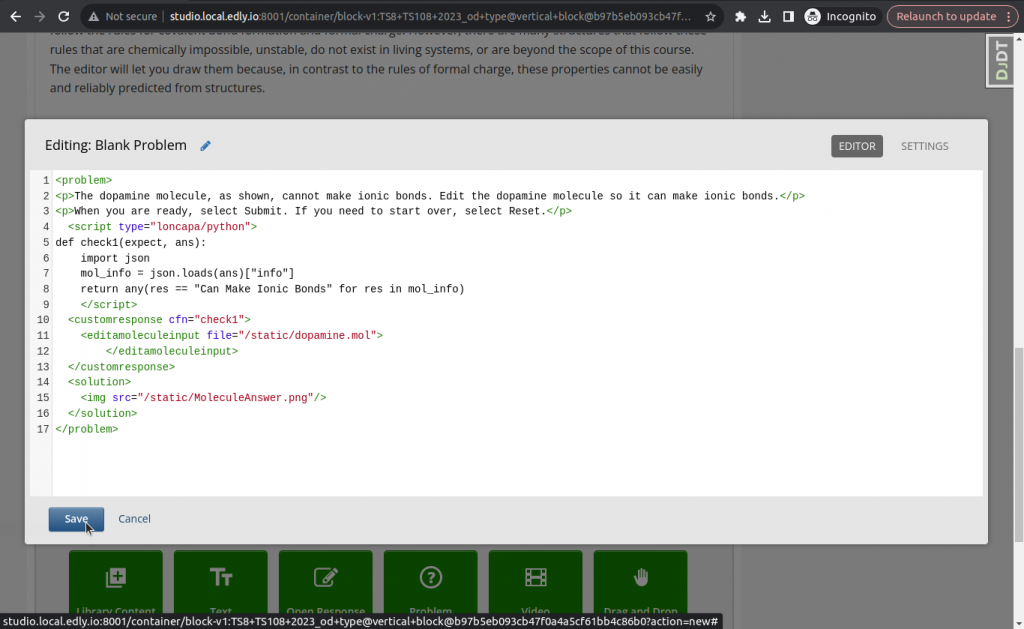
Step 4: Create a Problem Component
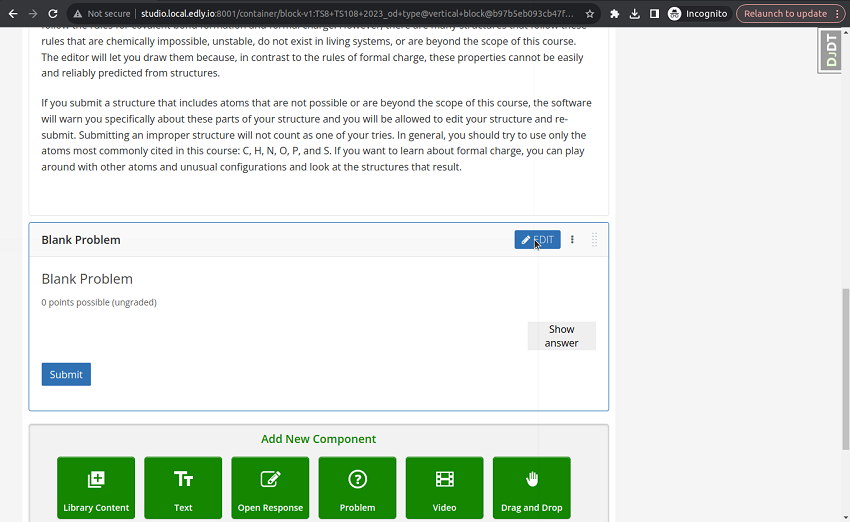
In the Problem component, Click the “Advanced” tab and Select "Blank Problem".
Click "Edit" in the problem component.
Paste the specific problem component code provided in the Open edX documentation for your release.
"Save" to store the component.
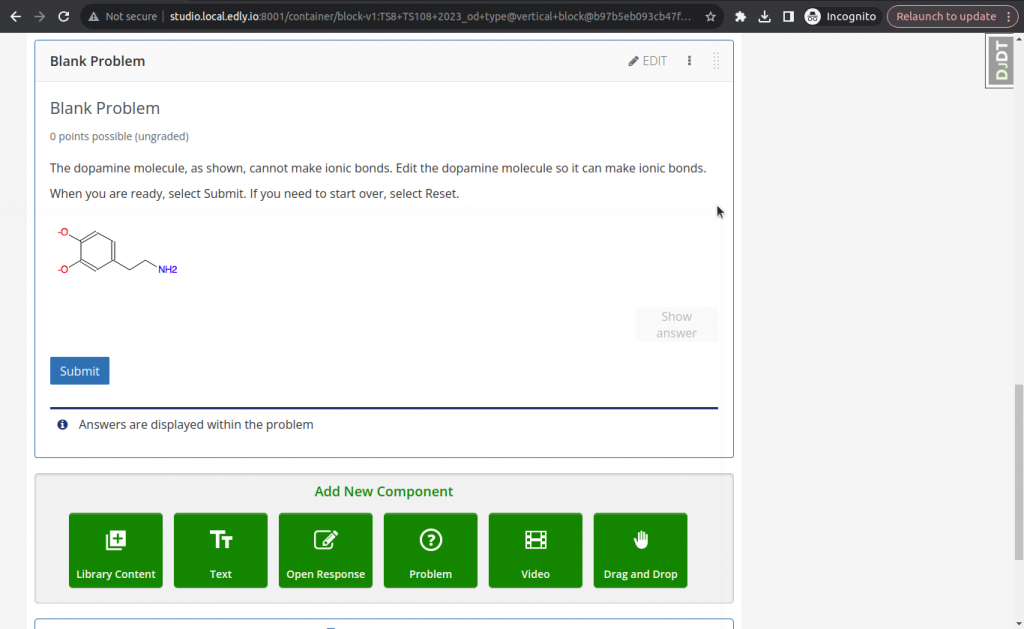
Step 5: Test and Refine
Preview your course to test the functionality of the Molecule Editor.
If any adjustments are needed, revisit the HTML and problem components to make modifications.
Save any changes and retest to ensure the editor functions as intended.
Let’s move to the Molecule Viewer Tool in Open edX, understand the basics, and learn how to use this tool for Open edX courses.
Molecule Viewer Tool In Open edX
With the Molecule Viewer Tool, students can create three-dimensional representations of molecules, offering a visually immersive learning experience. It seamlessly integrates into Studio without the need to download anything manually thanks to JSmol, a JavaScript-based molecular viewer from Jmol. The given image shows the Molecule Viewer Tool in action.
How to create Module Viewer Tool
Note:
Molecular viewer tools must be created using a third-party file hosting service, such as Amazon Web Services Simple Storage Service (AWS S3). Creating a molecule viewer involves uploading a folder containing a large number of files to the file hosting site.
Follow the given steps to create a molecule viewer tool.
Step 1: Download Required Files
Download a .mol file for the molecule you want to show from the BioTopics website.
From edX, Download the MoleculeViewerFiles.zip, which contains essential files for the tool.
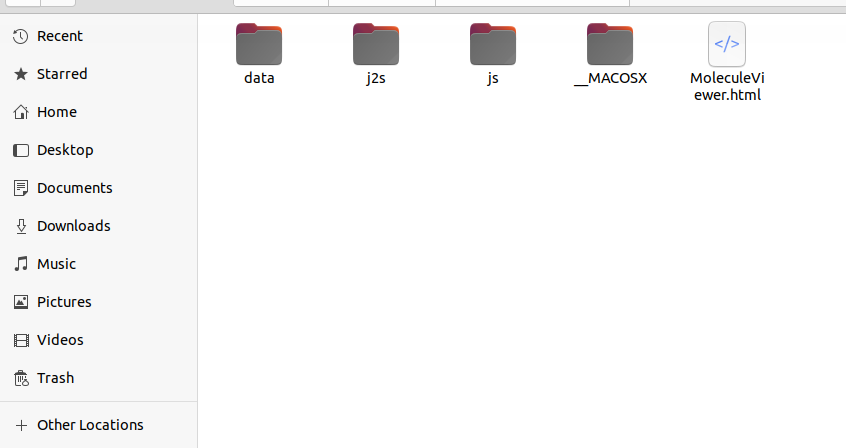
Step 2: Organize and Edit Files
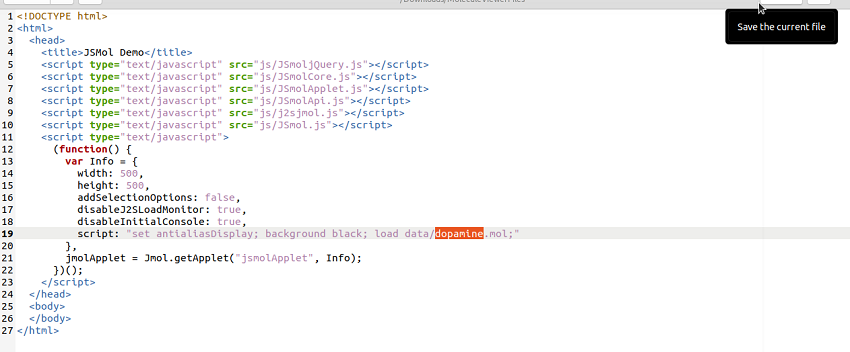
Unzip the MoleculeViewerFiles.zip, and extract the contents to reveal folders named “data”, “j2s”, “js” and a file named “MoleculeViewer.html”.
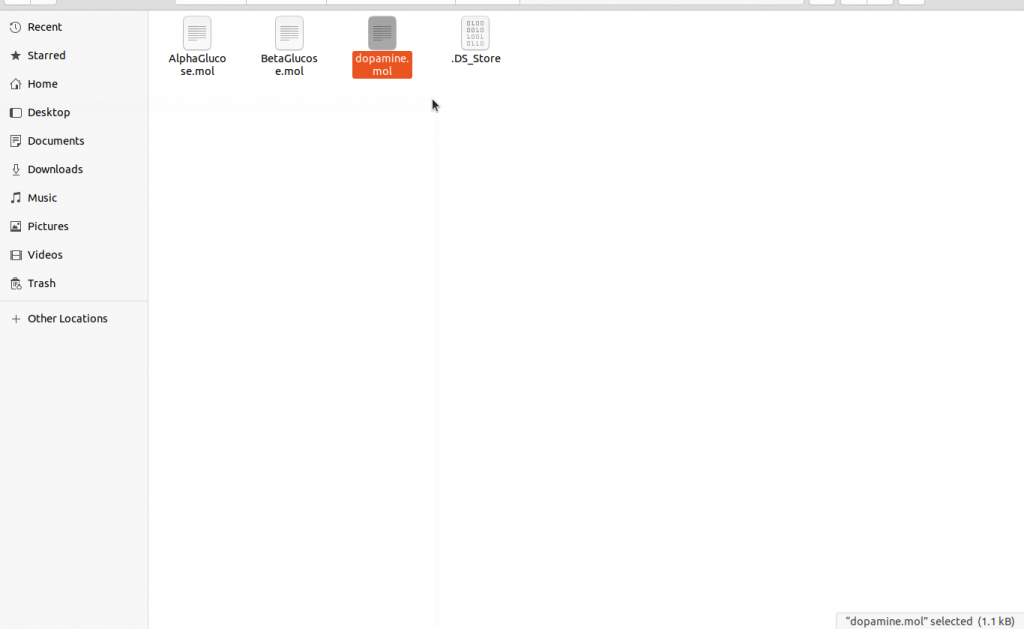
Move .mol file you acquired into the “data” folder.
Open the MoleculeViewer.html file in a text editor and change “Example.mol” on line 19 to the exact name of your .mol file.
Step 3: Upload Files
Upload the entire MoleculeViewerFiles folder (containing the modified files) to your file hosting site.
Step 4: Create a Component in Studio
In Studio, open the unit where you want to add the viewer.
Add a new HTML component, specifically an IFrame.
To add the path of your file hosting site's URL in the HTML Source Code box, simply replace the text "path_to_file" with the URL of your hosted file.
<p><iframe name="moleculeiframe" src="https://path_to_folder/MoleculeViewerFiles/MoleculeViewer.html" width="500" height="500"></iframe></p>To save the component, click Save and then OK to close the HTML Source Code box.
Click “Preview” to see your component as a student would.
Note: Enter your file hosting site's URL instead of path_to_file.
That’s it. With simple steps, you can easily create a Molecule viewer tool for your Open edX Course and make learning more engaging and easy.
Conclusion
The Molecule Editor and Viewer Tools stand as formidable pillars in the realm of molecular education within the Open edX platform. These tools not only empower educators to create engaging and interactive learning experiences but also provide students with a dynamic and hands-on approach to understanding complex chemical structures.
Both tools work together to create a comprehensive and engaging learning environment within Open edX. They enable educators to go beyond theoretical explanations, offering students a tangible and interactive way to explore chemistry.
Hire dedicated Open edX developers from CodeTrade and enjoy the advantages of remote development effortlessly. CodeTrade guarantees timely delivery and project success. Reach out to CodeTrade now and get a free consultation for your Open edX project.